

Toggle Clamps for Assembly Fixtures and Checking Fixtures: How to Choose
To choose toggle clamps for assembly fixtures, start with the job each clamp does. Hold-down clamps press parts onto supports, push-pull clamps push them against side stops, and latch clamps close covers and gates. Locate the part first, then clamp it the same way every cycle, with handles the operator can reach easily.
Assembly and inspection fixtures look simple next to a weld cell. There is no spatter, no heat and no shrinkage. But they ask something different of a toggle clamp. An assembly fixture has to present parts in the same place for every operator, all shift. An inspection (checking) fixture has to hold a part so the measurement is the same every time it is taken.
This guide covers how to choose and place toggle clamps for both jobs. It focuses on four things: locating before clamping, matching the clamp type to the task, repeatability for inspection, and operator access.
Locate First, Clamp Second
In any fixture, locators set the position and clamps hold it. Our article on alignment vs. clamping → explains the principle. For assembly and inspection fixtures, it leads to three practical rules:
- Push into the locators, never away from them. Each clamp should press the part toward a fixed pin, pad or stop, so clamping finishes the locating.
- Clamp over support. Put the spindle above a locating pad or rest, so the clamp holds the part without bending it.
- Close clamps in a set order. Close the clamps that seat the part against its main locators first, then the rest. Number them on the fixture so every operator uses the same sequence.
Which Toggle Clamp Fits Which Assembly Task?
Match the clamp to the direction the part must be held and to the space around it. Our guide to the types of toggle clamps → covers each style in full. Here is how they map to assembly and inspection work:
| Task | Clamp type | Why |
|---|---|---|
| Hold a part flat on rests or pads | Vertical hold-down | Presses straight down; the upright handle is easy to see and reach |
| Hold down where a gauge or probe needs clearance | Horizontal hold-down | The handle lies low when clamped, out of the way of tools above the part |
| Push a part against side stops or close a gap between two parts | Push-pull (straight-line) | Drives a plunger in a straight line along the locating direction |
| Hold a hinged cover, clamping bar or fixture gate closed | Latch (pull-action) | Pulls two parts together and locks them closed |
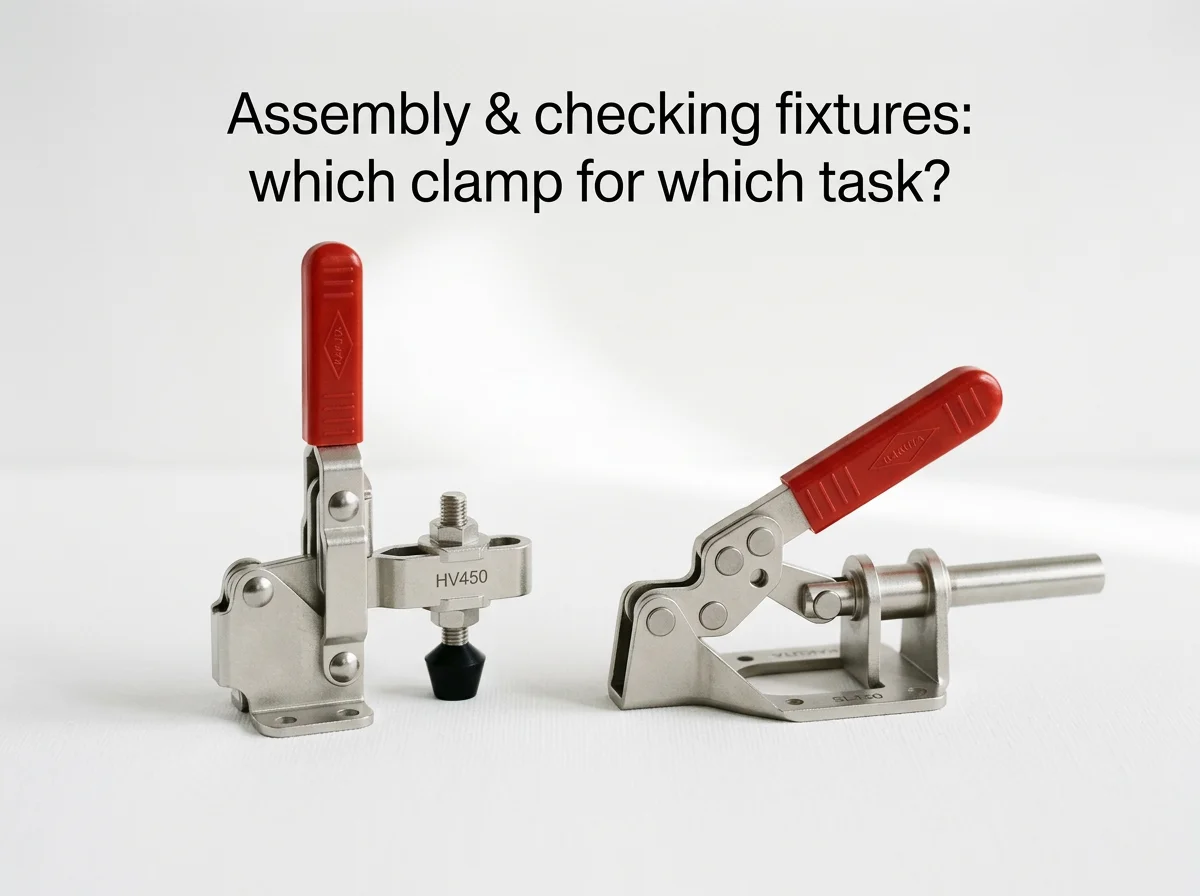
Vertical hold-downs: the HV 450
For most parts that sit on rests, a vertical hold-down is the default. The HV 450 → is a U-bar version of the HV 350, with a holding capacity of 225 kg (496 lbs). Its handle moves 60° and its bar moves 100°. It is supplied with spindle assemblies and two flanged washers, and a stainless steel version, the HV 450-2S, is also available. Browse the full vertical handle range →.
Push-pull clamps: the SL 150
When a part has to be pushed sideways into its locators, a straight-line clamp does the job directly. The SL 150 → has a holding capacity of 135 kg (298 lbs) and a plunger travel of 31.7 mm (1.25 in). Its plunger thread is M8x1.25 on the metric version and 5/16-18 on the inch version. See the straight-line action range → for other sizes.
Latch clamps for covers and gates
Many checking fixtures have a hinged bar or cover that closes over the part. A latch clamp holds it shut with steady tension. Our guide to latch toggle clamps → explains how pull-action clamps work and how to mount the latch plate.
Locators decide where the part is. Clamps decide whether it stays there, the same way, every cycle.
How Do You Keep Inspection Results Repeatable?
On an inspection fixture, the clamp is part of the measurement. If it holds the part differently from one cycle to the next, the readings move too. These habits keep them steady:
- Same position, every time. Bolt clamps rigidly to the fixture plate, and set each spindle height once. Then lock it with its nuts so it can't drift.
- Same force, every time. A toggle clamp closes to the same position on every cycle, so a correctly set spindle gives consistent pressure. Re-check the setting after maintenance or a part change.
- Hold, don't distort. Use only as much force as the part needs to stay seated. Too much can bend thin or flexible parts and change the measurement.
- Clamp where the drawing says. Hold the part at its datum features. For flexible parts, the drawing may state that the part is inspected in a restrained condition, so clamp as it specifies. Datum rules are defined in standards such as ASME Y14.5 →.
- Keep contact points off measured surfaces. Place spindle tips away from the features being checked, and use a contact pad that won't mark finished surfaces.
Check the clamp, not just the gauge. If readings drift, inspect the clamps before recalibrating anything. Look for loose spindles, worn contact pads and loose mounting bolts. Our maintenance guide → covers what to look for.
Designing for Operator Access
An assembly fixture is used hundreds of times a shift. Small access problems turn into lost time and inconsistent loading. Plan for the operator from the start:
- Point every handle toward the operator. Handles should be reachable from the loading position without stretching across the part.
- Keep the loading path clear. When open, each clamp should swing fully out of the way, so parts can go in and out without catching on a bar or spindle.
- Leave room for tools and gauges. Use horizontal hold-downs where screwdrivers, probes or gauges need to reach the part from above.
- Make the order obvious. Number clamps or mark them on the fixture, so the closing sequence is the same for every operator and every shift.
- Mount for the long term. Bolt clamps through every mounting hole into a flat, rigid plate. Our installation guide → covers the details.
Checklist: Toggle Clamps for Assembly Fixtures and Checking Fixtures
| Check | Do this |
|---|---|
| Locating | Fixed pins, pads and stops position the part; clamps only hold it there |
| Clamp type | Hold-down for flat seating, push-pull for side locating, latch for covers and gates |
| Placement | Over support, pushing toward the locators, away from measured surfaces |
| Force | Enough to seat the part, without distorting it; spindles set and locked |
| Sequence | Clamps numbered and closed in the same order every cycle |
| Access | Handles toward the operator; clear loading path; room for tools and gauges |
If your fixture also sees welding, the demands change: spatter, heat and weld current. Our guide to toggle clamps for welding fixtures → covers those.
Conclusion
Good toggle clamps for assembly fixtures and checking fixtures do three things well. They hold the part against its locators, they do it the same way every cycle, and they stay out of the operator's way. Choose the type from the task: vertical hold-downs like the HV 450 for seating parts, push-pull clamps like the SL 150 for side locating, and latch clamps for covers and gates. Then set them once, lock them and keep them maintained.
Frequently Asked Questions
Which toggle clamp is best for an assembly fixture?
It depends on the task. Use a vertical hold-down such as the HV 450 to press parts onto rests, a push-pull clamp such as the SL 150 to push parts against side stops, and a latch clamp to hold covers or gates closed. Horizontal hold-downs suit places where tools or gauges need clearance above the part.
How do toggle clamps help inspection repeatability?
A toggle clamp closes to the same position on every cycle. With its spindle set once and locked, it holds the part in the same place with consistent pressure, so measurements are taken under the same conditions each time.
Should clamps or locators position the part?
Locators. Fixed pins, pads and stops set the position, and each clamp pushes the part toward them. A clamp should never be relied on to find the part's position.
Can clamping force affect inspection results?
Yes. Too much force can bend thin or flexible parts and change what is measured. Use only enough force to keep the part seated, and clamp at the features the drawing specifies.
What are the holding capacities of the HV 450 and SL 150?
The HV 450 has a holding capacity of 225 kg (496 lbs). The SL 150 has a holding capacity of 135 kg (298 lbs), with a plunger travel of 31.7 mm (1.25 in).
Request a quote for your fixture
Tell us about your assembly or inspection fixture and our team will help you choose the right clamps. Kakuta has manufactured precision toggle clamps since 1959.
Contact our team →Questo articolo è disponibile anche in italiano: Morsetti a ginocchiera per dime di assemblaggio →
